June 23, 2024
What's On My Desk: 2024 Edition
The (frankly) absurd lengths I'll go through not to push more than one button to switch between my work and personal computers.
Next month is my seven-year anniversary of working from home. Since then, I've learned a lot about having a workspace that is functional, minimizes annoyance, and allows me to do my best work. The biggest thing I've learned is that while I really enjoy having a separate work and personal computer, I don't like the idea of having separate anything else. The idea of having to switch between a work keyboard and personal keyboard is something that I find deeply unacceptable. I'm sure it works for some people, but it's not something I could manage myself. I want one set of peripherals, shared between two computers. I want to buy high quality hardware just once and get that benefit both personally and professionally with the push of a single button. While it's taken a while to get the implementation details down, I think I've finally found something that gets me incredibly close to that ideal. I've been using most of this setup for the past two-and-a-half years and have recently made a few adjustments to eliminate some of the pain points I've run into in the past. This is my best attempt yet at a completely ludicrous work-from-home setup that is easily shared between a personal and a work computer at the push of a button.
The centerpiece of the whole setup is a Level1Techs KVM, specifically the DisplayPort 1.4 Single Monitor – Two Computer 10Gbps model. This wonderful little piece of hardware allows me to share my 4K 144Hz monitor and USB peripherals between both my work MacBook Pro and my personal desktop. Many other KVMs, especially the more affordable options, omit full DisplayPort 1.4 compatibility, which would limit me to a paltry 60Hz refresh rate. As anyone who has used a high-refresh rate display can attest, it's a difficult comfort to give up.
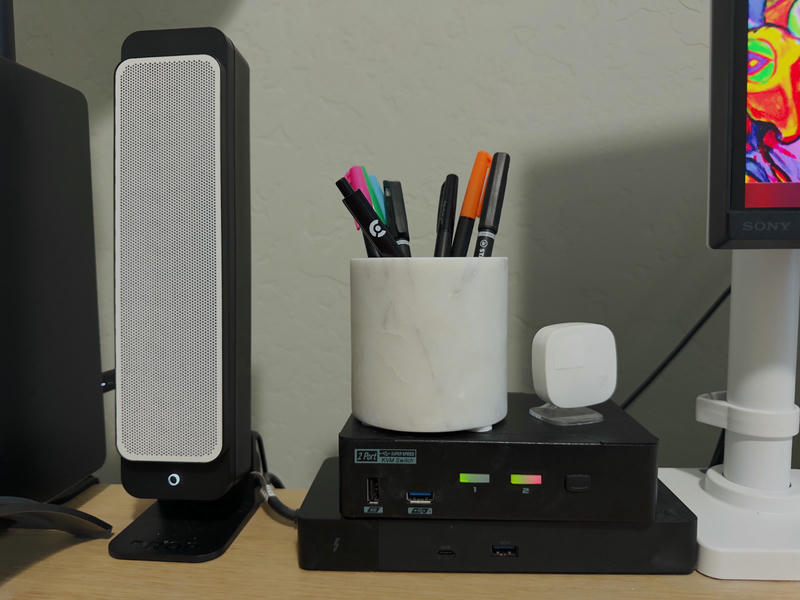
Switching between computers is as easy as pressing a single button, which moves my monitor, keyboard, mouse, microphone, teleprompter, and Stream Deck between computers. If you read my post from a year ago, you'll notice an interesting omission: my webcam. While resetting the USB hub every time I switched computers worked, it wasn't exactly an elegant solution. That's where the recently released Elgato Game Capture Neo comes in.
The Game Capture Neo works similarly to the Elgato CamLink: it takes in an HDMI signal and presents that to the host computer as a UVC device (which most software understands as a webcam). The neat extra feature it has that the CamLink doesn't is HDMI passthrough; since this is designed to capture gaming footage, having the ability to pass the HDMI signal along to a display is useful. For me though, this allows me to connect my HDMI webcam to two computers simultaneously, without having the awkward dance of resetting the USB hub to get the CamLink working when I switch computers. I've used this setup for a week at my new job and it seems to be working reliably. There is one small issue though: the Game Capture Neo advertises a variety of compatible resolutions, both in 4:3 and 16:9 aspect ratios even when the source aspect ratio is 16:9. This means that when software requests a 640x480 resolution, the Game Capture Neo happily squishes my 16:9 video into a 4:3 container. Thankfully I've only run into one application where this is the case, but I work around this using Camo. Think of it as a more user-friendly OBS. Camo allows me to request only the 720p output of the Game Capture Neo and is smart enough to correctly scale that when another piece of software requests a 640x480 video stream. I use Camo in applications that expect a 640x480 output from the webcam, and the Game Capture Neo in everything else.
Speaking of video calls, I've also added an Elgato Prompter to the mix. I really like the idea of being able to make eye contact while on a video call (something that companies like Microsoft are going so far as to use AI to fake), and the Elgato Prompter allows that by putting a specially designed reflective mirror in front of your webcam. It has a small screen that acts as an external display that you can put your video call on, which allows you to look directly into the camera lens. It's not without its faults though; I had to add a circular polarizer to my camera to eliminate a glow that came from the screen, which darkens the image a bit. This is easily rectified with the use of two Elgato Key Lights, which also help combat the darkness of my home office. The Prompter uses a technology called DisplayLink, which allows you to connect displays over non-display protocols like USB and TCP/IP; this helps when you have a device that doesn't have any available display out ports. I've found that this isn't the most reliable thing in the world, but it's a small price to pay for the benefit I feel that it brings.

For a webcam, I use a Sony a6000 with a Sigma 30mm f/1.4 DC DN Contemporary lens. This was the camera I originally upgraded to when I became unsatisfied with the quality of typical webcams, but I switched to the Sony a5100 for its pop-up display; since the Elgato Prompter blocks the camera I decided to switch back. The a6000 also gives me the ability to control the camera via an IR remote, which is useful for adjusting settings without having to unmount the camera from the prompter to be able to see the display. I also have the camera plugged into a Philips Hue Smart Plug, which allows it to be turned on and off without physically moving the power dial on the camera.
I've also upgraded my audio setup, switching from the Mackie CR3 monitors to the Drop BMR1 Nearfield monitors. These diminutive speakers don't have incredible reviews, but I mainly got them for their size, not their performance characteristics. This is mostly because I've recently outfitted my office with a stereo pair of the Sonos Era 100s, which I use to listen to music (which is the main reason I'd want good speakers anyway). The BMR1s have been sufficient for the occasional YouTube video and work wonderfully for video calls. Plus, they take up significantly less space on my desk compared to the CR3s.
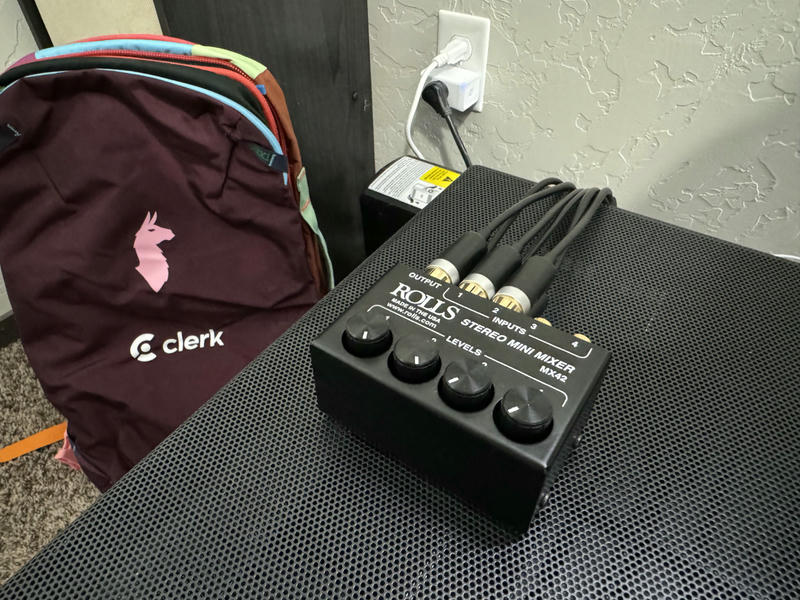
Previously, I was able to connect both my work and personal computers directly to the CR3s due to them having multiple inputs. The BMR1s only have one line-in, but this is trivially solved with the Rolls MX42 Stereo Mini Mixer, which is a passive device that can take in up to four stereo signals and output them over one output. This allows me to have both computers outputting simultaneously to the same set of speakers. This is convenient since it allows me to get notifications from both computers at the same time.
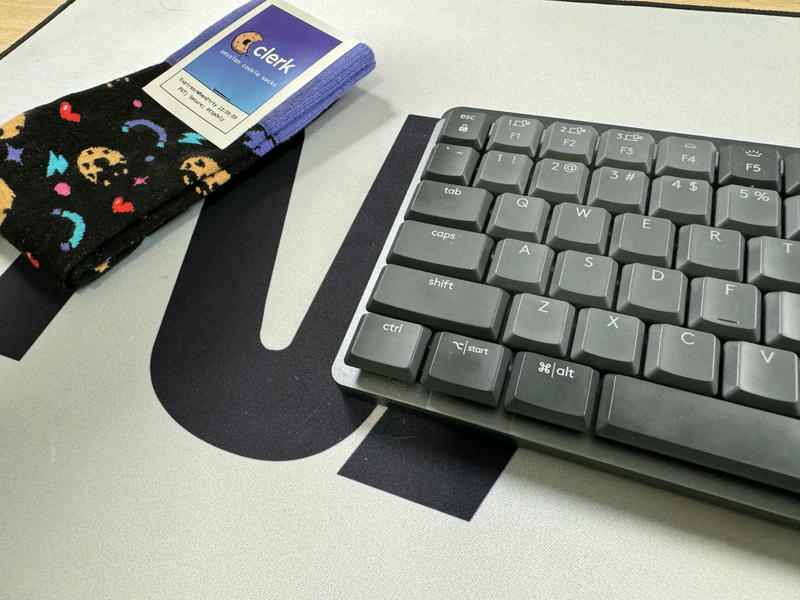
For keyboard and mouse, I use the Logitech MX Mechanical Mini and the MX Master 3S. Both connect to Logitech's wireless Bolt receiver, which allows them to switch between computers with the rest of the USB peripherals. This setup wouldn't work with Bluetooth devices, since those are bound to a specific host. I also love that the MX keyboards are designed for both Windows and macOS, with appropriate labels on the keys. Lots of other keyboards offer a Mac/PC switch, but this is usually a physical toggle on the device itself; the Logitech keyboards change their behavior based on what OS the receiver is connected to. This means that the keyboard switches between Mac and PC layouts automatically when the KVM switches between computers. No manual intervention required. This is important because the position of the Super key (Start on PC keyboards and Command on Mac keyboards) is immediately to the left and right of the spacebar on a Mac layout, whereas that key position is used for the Alt key on a PC layout. Once I get used to the layout switching, I'll probably explore building my own keyboard that has similar behavior; while I think the MX Mechanical Mini is a great keyboard, I do miss the loud "thock" of my previous keyboard, the Drop ALT.
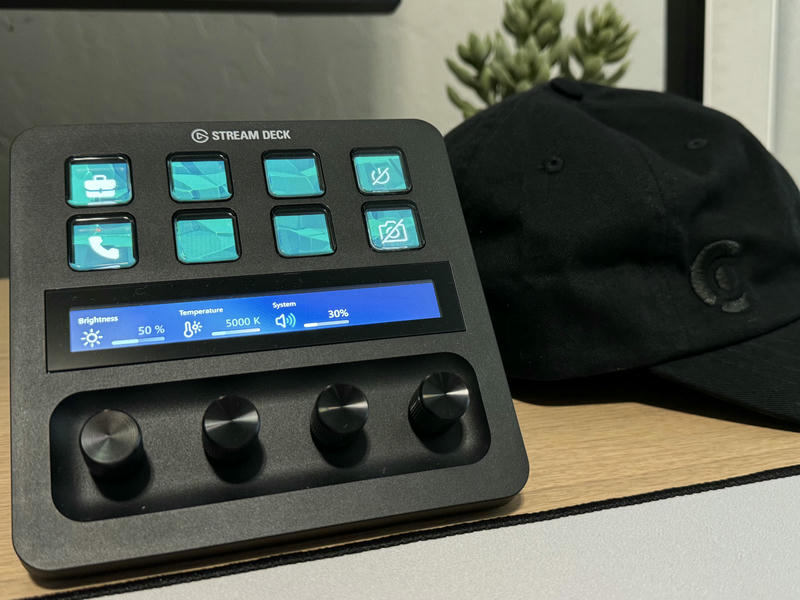
Another new piece of desk gadgetry that I've acquired recently is the Elgato Stream Deck +. I've owned the Stream Deck Mini for several years, but I never really loved using it because it felt so chintzy; pressing the keys required more force than pushing it across my desk, meaning I had to hold it in place and press buttons. The Stream Deck + is heavier, which results in button presses requiring less force than moving it, which makes it feel more stable. The larger model also has some lovely tactile knobs that I use to control the brightness and temperature of my Key Lights, along with my system volume. I have actions setup to put my office into video call mode, which turns the webcam on, turns the Key Lights on, dims my overhead lights, and turns on a light in my hallway for some additional contrast. I'm still finding ways to integrate it into my setup; I'm pretty sure I can figure out a way to have it trigger the KVM, which would allow me to mount the KVM underneath my desk. The touchscreen to switch pages is also a nice feature, although I'd love the ability to switch pages with a knob instead.
At my previous job I used the Dell WD19TBS Thunderbolt 3 dock with the Dell laptop they supplied. I was surprised to see that it works wonderfully with a MacBook Pro, including full 4K 144Hz DisplayPort output over the Thunderbolt 3 port. The dock doesn't have audio out, but that's fine since I usually try to use the Apple USB-C to 3.5mm Headphone Jack adapter anyway. Its digital-to-analog converter is excellent, but it seems to have issues being plugged into a USB-A to USB-C adapter, which results in the DAC going completely haywire and outputting full-volume static every few hours. I switched to the Creative Sound BlasterX G1, which uses USB-A, and haven't had any issues.
Overall, I'm happy with the setup I've managed to assemble given the quality it results in. I get to use a great 4K 144Hz monitor, a mirrorless DSLR webcam, teleprompter, wireless keyboard and mouse, and more between both my work and personal computers, all with the push of a single button.
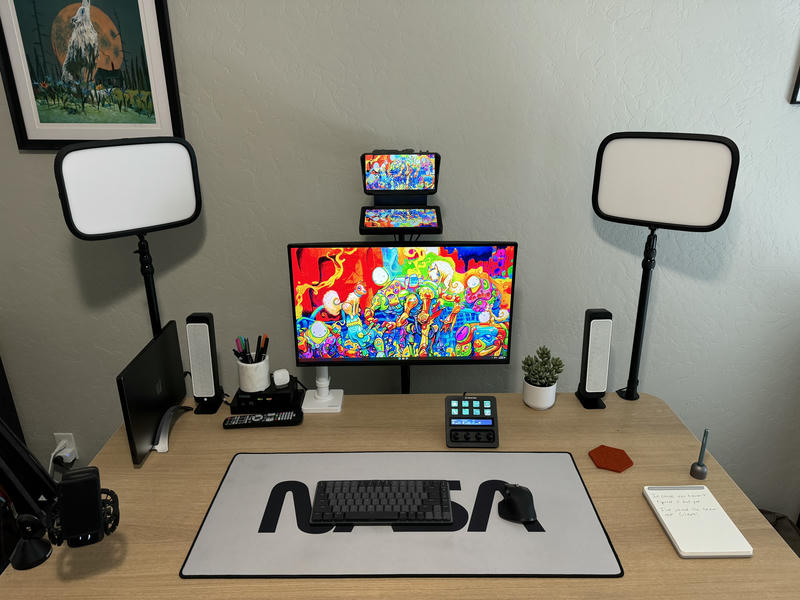
Hardware Used
- Level1Techs DisplayPort 1.4 KVM
- Anker 7-Port USB 3.0 Hub
- Sony INZONE M9 4K HDR 144Hz Gaming Monitor
- Ergotron NX Monitor Arm
- Camera
-
Audio
- Rolls MX42 Stereo Mini Mixer
- Drop BMR1 Nearfield Monitors
- Sonos Era 100
- Apple USB-C to 3.5 mm Headphone Jack Adapter
- Creative Sound BlasterX G1 USB DAC
- Elgato Wave:1 (discontinued, replaced by the Wave:3)
- RODE PSA1 Studio Arm
- Logitech MX Keys Mechanical
- Logitech MX Master 3S
- Elgato Stream Deck +
- Dell WD19TBS Thunderbolt Dock